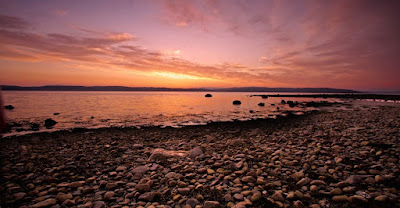
The sun is shining, the sunsets have a warm glow, interesting shadows abound. At last, summer. Apparently we skipped spring after a 6 month winter this year (it snowed at some time in every month in West Lothian from November 2009 to April 2010!). I dont remember that happenning before.
But here we are, it's time to get the hiking boots on and start yomping about the countryside, looking for new locations. To make it even more fun, I bought a dog over the winter (for about the cost of two lenses - did I do the right thing!!). So, as I hadn't seen my trusty native guide, TB, in quite a while and she was keen to see the new pup, I asked her to show me a part of Edinburgh that I've always wanted to visit but had never found the way into - the Cammo Estate.
You've probably seen it if you've driven from Newbridge to Barnton. The big tower on the left with no apparent purpose. I've always found it curious and wondered if Rapunzel was up there waiting for me to give her hair a wee tug. So, font of all geographic and historical knowledge TB came to the rescue - she's been hiking round there for years.
Cammo is an ancient estate that was deliberately run down to ruins by the last owner before being set on fire by vandals in the 1970s. It was a huge estate with many ancient building, the grounds were the first landsca ped gardens in Scotland and the great tower I had seen from the road was a water tower. Only the tower remains in it's former glory, the rest has been reclaimed by nature and dog walkers. We had a good walk around the place, with the wee pup, Oscar having a whale of a time bounding throughthe long grass an dpretending to be brave. TB told me that the place was supposed to be haunted buut would tell me no more. Consider my interest piqued! On the way round I spotted 3 angles that though would make good images (no camera with me!!!!) and decided I would return soon.
3 days later, having read up on the ghost stories (masochist!) off I set, sans dog, avec camera. No sign of the white lady, the man in the top hat or the phantom dogs, but I did jump at every rustle in the bushes and tried to laugh at myself. It can be a lonely and spooky feeling place! First up was the main shot the classic scene of the tower itself. I was lucky and found some tractor tyre lines through the crops to act as lead in lines and was torn between a slow shutter speed to blur the wind blown crops and clouds scudding in the sky or a fast shutter to freeze the detail of the foreground crop leaves. So, this is a digital world and shots are free - I took both. In the end I went somewhere in the middle and got a little movement in the crops and some pretty nice clouds. Very pleased with the shot in the end.
Next I struck out for the tree covered hill, aiming to use a couple of low hanging branches and tree trunks to frame the tower. Hmmm... didn't work out as I had envisaged it. Never mind. I reckon a summer early morning could be good though if you could get some mist shrouding the tower. On the way back I thought about an arty shot, using the wide angled lens to curve the tower round the trees on the hill. It needed to be HDR though to get the detail in the stone. It works quite well but I thought it was a wee bit cheesy. Still, a keeper.
Last shot was back down by the car park where there is a meadow with some ancient and impressive trees. The sun was nice and low by now, kissing the leaves of the trees with bright warm light and I rattled off quite a few shots from different angles. Finally, when I was happy with the composition, I decided to counteract the strong contrast of the late sun by taking another HDR shot (or seven shots to be precise). There was a little wind and this, combined with the movement of the clouds gave the whole seen a slightly soft but pleasing feel. I often use the minor movements between HDR shots to give a softened other-worldly feel to an image. Not what HDR is designed for, but I like it! another shot that I was pleased with.

So I went for three shots, got two of them and a new one and all good enough to sell on my website PhotoForMyWall.com. That's a pretty good strike rate and really brings home the value of walking the scene and envisaging your shots ahead of photographing them. In all, the whole shoot took less than an hour, which is incredibly fast work.
I liked Cammo. Me and the dog will be back, again, without the camera.
But here we are, it's time to get the hiking boots on and start yomping about the countryside, looking for new locations. To make it even more fun, I bought a dog over the winter (for about the cost of two lenses - did I do the right thing!!). So, as I hadn't seen my trusty
 native guide, TB, in quite a while and she was keen to see the new pup, I asked her to show me a part of Edinburgh that I've always wanted to visit but had never found the way into - the Cammo Estate.
You've probably seen it if you've driven from Newbridge to Barnton. The big tower on the left with no apparent purpose. I've always found it curious and wondered if Rapunzel was up there waiting for me to give her hair a wee tug. So, font of all geographic and historical knowledge TB came to the rescue - she's been hiking round there for years.
Cammo is an ancient estate that was deliberately run down to ruins by the last owner before being set on fire by vandals in the 1970s. It was a huge estate with many ancient building, the grounds were the first landsca
 ped gardens in Scotland and the great tower I had seen from the road was a water tower. Only the tower remains in it's former glory, the rest has been reclaimed by nature and dog walkers. We had a good walk around the place, with the wee pup, Oscar having a whale of a time bounding throughthe long grass an dpretending to be brave. TB told me that the place was supposed to be haunted buut would tell me no more. Consider my interest piqued! On the way round I spotted 3 angles that though would make good images (no camera with me!!!!) and decided I would return soon.
3 days later, having read up on the ghost stories (masochist!) off I set, sans dog, avec camera. No sign of the white lady, the man in the top hat or the phantom dogs, but I did jump at every rustle in the bushes and tried to laugh at myself. It can be a lonely and spooky feeling place! First up was the main shot the classic scene of the tower itself. I was lucky and found some tractor tyre lines through the crops to act as lead in lines and was torn between a slow shutter speed to blur the wind blown crops and clouds scudding in the sky or a fast shutter to freeze the detail of the foreground crop leaves. So, this is a digital world and shots are free - I took both. In the end I went somewhere in the middle and got a little movement in the crops and some pretty nice clouds. Very pleased with the shot in the end.
Next I struck out for the tree covered hill, aiming to use a couple of low hanging
 branches and tree trunks to frame the tower. Hmmm... didn't work out as I had envisaged it. Never mind. I reckon a summer early morning could be good though if you could get some mist shrouding the tower. On the way back I thought about an arty shot, using the wide angled lens to curve the tower round the trees on the hill. It needed to be HDR though to get the detail in the stone. It works quite well but I thought it was a wee bit cheesy. Still, a keeper.
Last shot was back down by the car park where there is a meadow with some ancient and impressive trees. The sun was nice and low by now, kissing the leaves of the trees with bright warm light and I rattled off quite a few shots from different angles. Finally, when I was happy with the composition, I decided to counteract the strong contrast of the late sun by taking another HDR shot (or seven shots to be precise). There was a little wind and this, combined with the movement of the clouds gave the whole seen a slightly soft but pleasing feel. I often use the minor movements between HDR shots to give a softened other-worldly feel to an image. Not what HDR is designed for, but I like it! another shot that I was pleased with.
So I went for three shots, got two of them and a new one and all good enough to sell on my website PhotoForMyWall.com. That's a pretty good strike rate and really brings home the value of walking the scene and envisaging your shots ahead of photographing them. In all, the whole shoot took less than an hour, which is incredibly fast work.
I liked Cammo. Me and the dog will be back, again, without the camera.